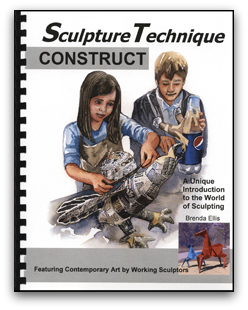
 Through our many years of homeschooling, we have done countless arts and crafts projects. We have also used some ARTistic Pursuits books. When given the opportunity to review ARTistic Pursuits once again, I almost declined, until I saw that Brenda Ellis has two new books: Sculpture Technique: Model and Sculpture Technique: Construct. The Model book deals with clay, putty, and fiber. Since we have done so much with clay before, I requested Sculpture Technique: Construct. This book is recommended for students who are in upper elementary through high school (ages 11-18). It is 83 pages long and retails for $47.95. It comes as a spiral-bound paperback.
These are not your typical sculpture art lessons. When I think sculpture for student art lessons, I think clay, maybe wire, but these lessons are about making paper and using that paper to create sculptures. It teaches sculpting out of cardboard, papier-mâché, and creating volume with wire.
I chose to work through the first unit, Creating Form in Papermaking, with my son who is in tenth grade. He enjoys art and working with his hands, so I figured this would be a new way for him to experience art. I made the decision to not do this review with my other children, who are 14 and 12, based on the seeming complexity of the projects when I first looked it over.
At the bottom of the table of contents is a supply list. One of the supplies is a papermaking dip handmold kit that allows you to make your own paper. Since we already had a paper recycling kit with much of the same equipment, we used that instead of going to the added expense. I did purchase a packet of construction paper so that he'd have many different colors available to him and wire for one of the projects we were to do.

You may be wondering why we had to make our own paper if we were just going to be sculpting with paper. The homemade paper is thicker and has more texture than regular white paper or construction paper. It is quite stiff, as well. My son began by tearing white copy paper and sheets of construction paper. He placed them in bowls of water for 30 minutes and then placed them in a blender with the water. After pulping the paper, he placed it in the pan of the recycling kit and used the mesh and the deckle to pull the pulp out so that it sat atop the screen. He used a sponge to pull as much water out of it as possible and then placed it in the paper presser. This papermaking process was the most tedious part of the entire project. For each new thing he made or different color he wanted to use, he needed to repeat the steps. It took quite a few days to accumulate all the paper he needed.

The first project was a low-relief sculpture. My son did not choose to create the same thing that was in the art book but, instead, made items related to Pokemon, his favorite game. He made a low-relief Pokeball. I did not take a picture of that. I can say that he didn't create it to have much dimension. It was definitely low-relief, perhaps too low for my liking. Of course, now that he knows how to make his own paper, he can recreate his Pokeball so that it has more depth. One of the other projects in the first unit is "Wet Paper Construction" which requires a wire form, or armature, around which wet paper is molded. As you can see, my son created a Pokemon. He found it difficult to mold with the wet paper. He probably could have done a better job stabilizing his wire figure, too. Unfortunately, as I moved it to take a picture, I broke off one of the ears. The figures are fragile once they are dry.


Although my son wasn't terribly excited about how his figures turned out, he said he did like the Sculpture Technique: Construct book. He said it was fun and enjoyable despite the fact that it was time-consuming. I also learned a skill along the way that I didn't have before. Now that we both know how to make our own paper, we can practice more with the water-pulp ratios to make thinner or thicker paper. We can create just about any design of low-relief or sculptures using a wire form.
The lessons are extremely detailed and provide many images (black-and-white and color) to be sure the student understands the steps to be taken. Each unit has an evaluation so that the student can reflect on what they learned and created. Besides instructions for projects, Brenda Ellis teaches so much more. She explains form, low-relief, paper, wire armatures, planes, models, motion in sculpture, additive method, and so on. The third unit has a section on repairing the sculpture, adding a fabric surface, and adding texture.
An interesting article on "The Intersection of Art and Craft" by Daniel D. Ellis is provided at the end of the book along with answers to the evaluation questions. A course description is provided with an explanation of the high-school credits that can be awarded upon successful completion of the art program; there is also a suggested schedule for using this course. Templates are provided for some of the projects.
Seeing as this can be used to obtain high-school credit, I may use this next year, either finish it with my one son or use it in its entirety with my other son who will be in ninth grade next year. I look forward to seeing what models he can create out of cardboard or figures he will imagine out of papier-mâché.
I highly recommend Sculpture Technique: Construct. It provides a unique art experience. Be aware, however, that each project does require time and patience.
Find ARTistic Pursuits on Facebook:
https://www.facebook.com/ArtisticPursuitsInc.